Managing Environments in ASP.NET Core
1. Introduction
While managing multiple environments is mainly a DevOps concern, it’s my belief that every developer should be familiar with the concept. In this post, I’ll be covering how to make use of .NET environment variables. However, instead of jumping right into how to set and use environment variables, let’s first talk about what they are, and why they are useful in first place.
2. The Theory
2.1. Why Manage Multiple Environments?
Managing multiple environments is a core principle of DevOps, and is crucial for numerous reasons. For one, you will always want to completely isolate your development environment from the production to ensure unfettered development, so that the developers have the freedom to experiment, innovate and iterate on new features without the fear of accidentally breaking the live product. Controlled deployments will not only improve the maintainability of a system due to reduced risks, but will also increase stability of the overall system. Furthermore, isolating production environment will improve data security, as keeping production isolated helps prevent accidental data leaks or unauthorized access.
Moreover, one of the most glaring reasons to manage multiple environments for me is the aspect of configuration management. Typically, each environment will need a different set of configurations. For example, in the Development environment, you may prefer to serve JavaScript and CSS files unminified so that you can debug easily, and you will probably want to have developer exception page enabled, etc. On the other hand, serving minified static files on Production would improve performance, and you most certainly wouldn’t want to have developer exception page enabled on production as it could potentially expose sensitive information to users, or display information that would be useful to hackers. This is where the need for conditional configuration management especially arises, and we can achieve just that with the use of environment variables.
2.2. What Are .NET Environment Variables?
The ASP.NET Core framework specifically looks for an environment variable named ASPNETCORE_ENVIRONMENT on the system whenever a project is starting up to understand what the current environment is. In essence, an environment variable is an external, named value that has been defined on OS-level which persists even if the computer shuts down. You can think of it like a static string variable that has been defined on your operating system, and that your projects read the value of this variable to determine the environment.
By convention, the env. variable will be set to either Development, Staging or Production, but you have the freedom to set it to any value you’d like. An important note to make here is that in the absence of a value, ASP.NET Core automatically assumes Production (so you don’t have to set it on production, which is convenient).
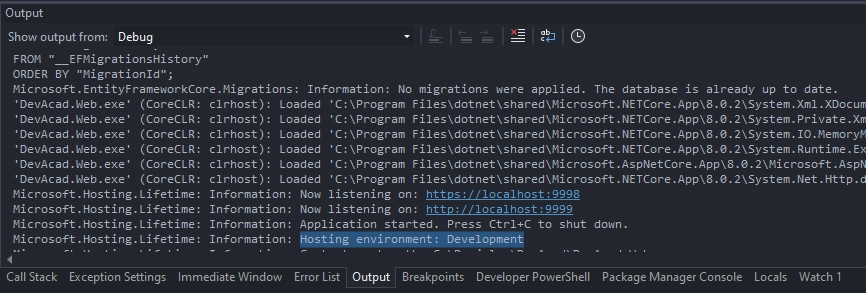
Tip: When you run your application using dotnet run (or when you click the green “start” button in Visual Studio, which runs this command 🙂), the current hosting environment will be printed to the console.
It is possible to use the --environment parameter with the dotnet run command to specify the environment, which would look like:
dotnet run --environment StagingHowever, I would recommend against using this method and using launch profiles instead (which I’ll cover next).
In case you have environment variable defined on OS-level and want to run the application without any launch profiles (which is an obscure scenario, but I suppose this is good to know), you can run the following command:
dotnet run --no-launch-profile2.3. The Role Of Launch Profiles
The launch profiles, which are defined in the Properties/launchSettings.json file, define multiple ways in which you can run your .NET application, each with its own set of options. Launch profiles can be used to set the environment variable (by default, they set it to Development). In fact, when the env. variable is specified via launch profile, the system’s env. variable is disregarded.
When environment variable is specified via launch profile, it overrides the system’s environment variable.
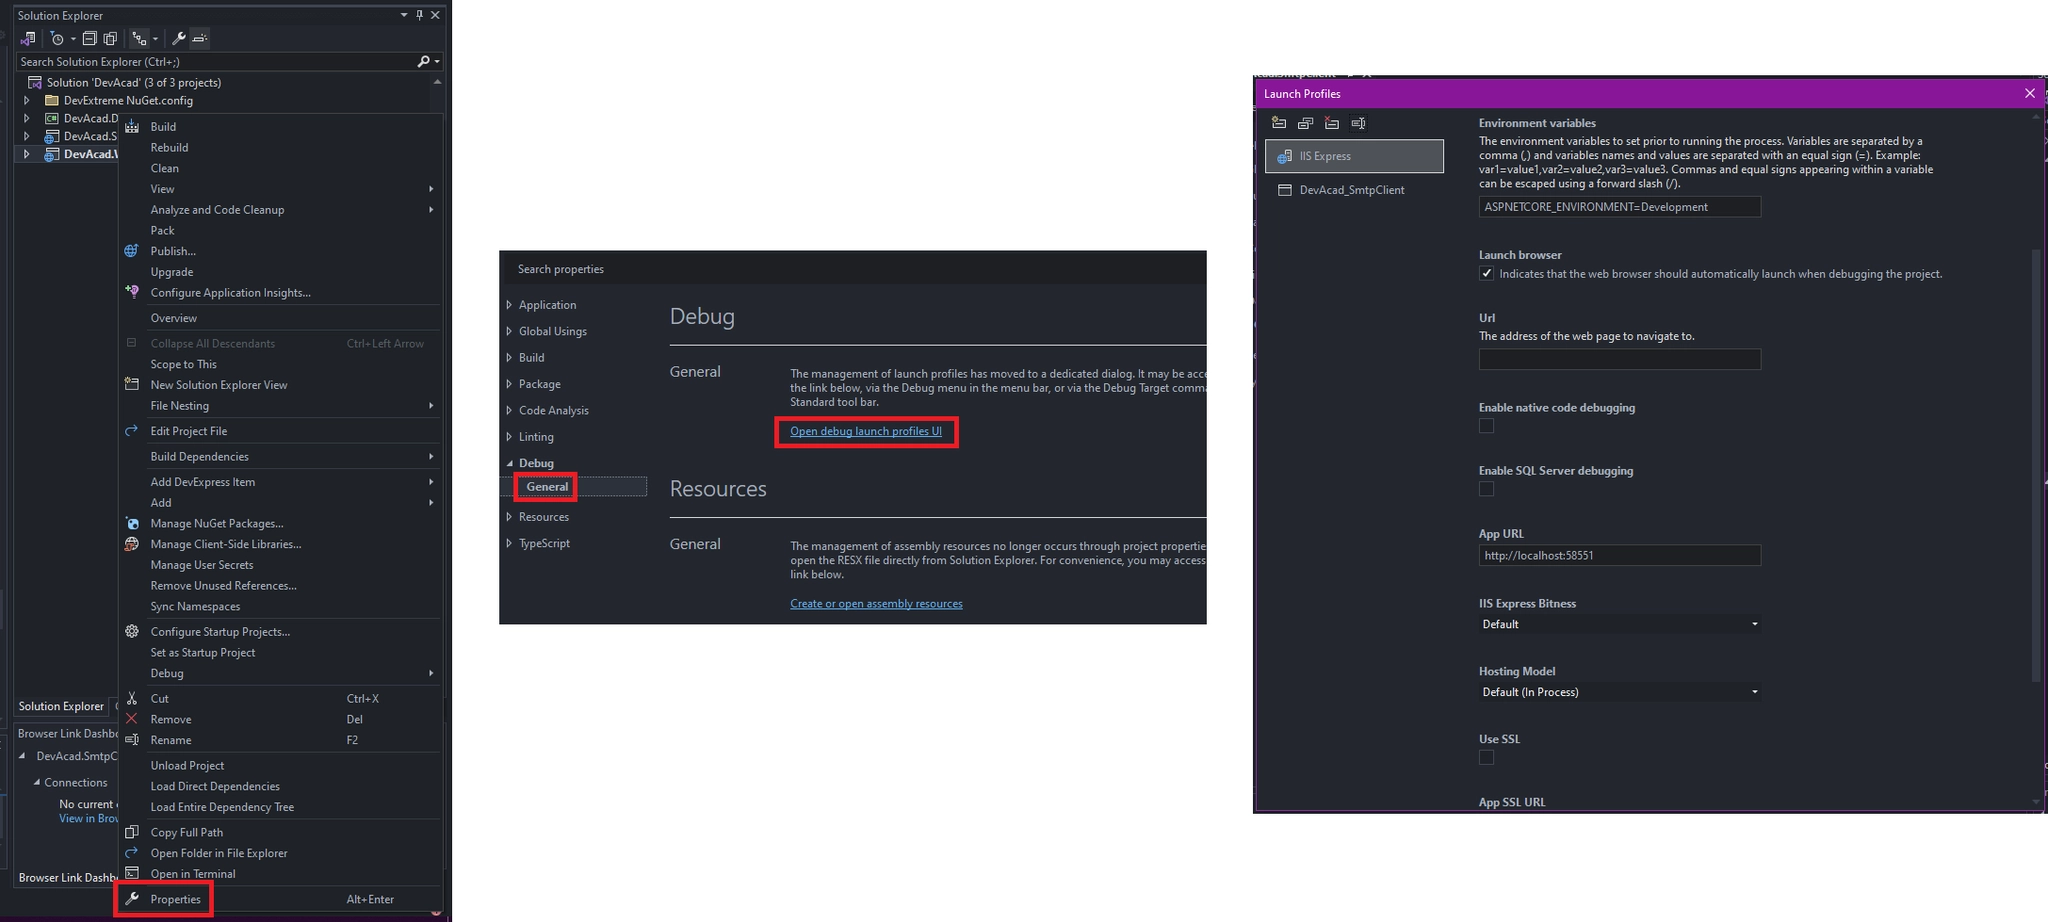
Visual studio provides a convenient way to modify launch profiles via the dedicated “debug launch profiles UI” which you can open by going to your project’s properties, switching to the “Debug” tab, and clicking “debug launch profiles UI”.
However, if you are like me, you will prefer to simply open up the launchSettings.json file and edit it directly. Here is what that would look like:
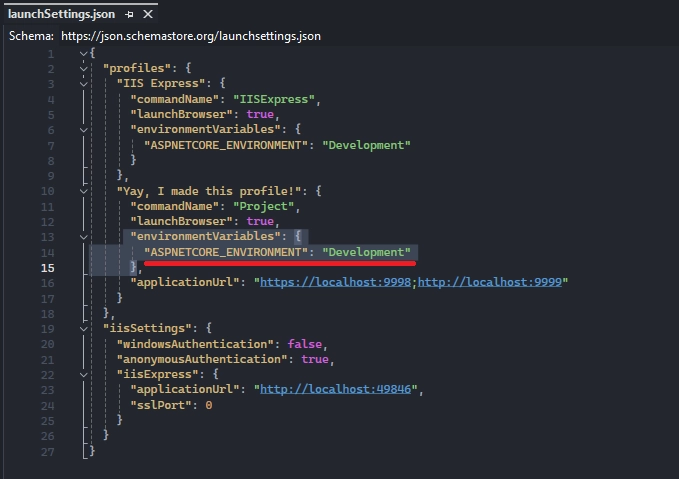
While launch profiles are a topic of their own, the relevant part for us here is the environmentVariables section (regardless of whether the profile is IIS or Kestrel). The launch profiles you get when you create a new project will set the environment variable to Development by default, which you should keep in mind. If you ever want to simulate a different environment within your development setup, you can set your desired environment in your launch profile.
Note: When using Visual Studio Code, you will have .vscode/launch.json which has a different structure, but the same ideas apply.
3. Setting the Environment Variable
There are multiple ways in which you can set the environment variable on a system, and the approach you choose is mostly based on preference. Note that the environment values in launchSettings.json override values set in the system environment, which are the launch profile settings. During development, you will most likely rely on launch profiles to manage environment, and the approaches below are mostly relevant for non-development environments.
3.1. Using Command Line
You can set environment variables in Windows via command prompt using the setx command which comes with the OS. The setx command sets environment variables to the user or system environment. Since ASP.NET Core will look for the ASPNETCORE_ENVIRONMENT variable, that’s the variable we want to create. Here is the command:
setx ASPNETCORE_ENVIRONMENT Staging /M
dotnet run --no-launch-profile
The /M at the end instructs to set the environment variable at the system level, which is what I would recommend. If, for some reason, you want to set the environment variable for the user account, simply remove the /M.
--no-launch-profile parameter of dotnet run allows to ignore launch profile settings. You won’t need to do this if you are not running the project in Visual Studio.
3.2. Using PowerShell
Similar to using CMD in Windows, you can also use PowerShell to set environment variable:
$Env:ASPNETCORE_ENVIRONMENT = "Staging"
dotnet run --no-launch-profile
Once again, the --no-launch-profile parameter of dotnet run allows to ignore launch profile settings, which is irrelevant if you are not running the project in Visual Studio.
3.3. Using Windows Settings
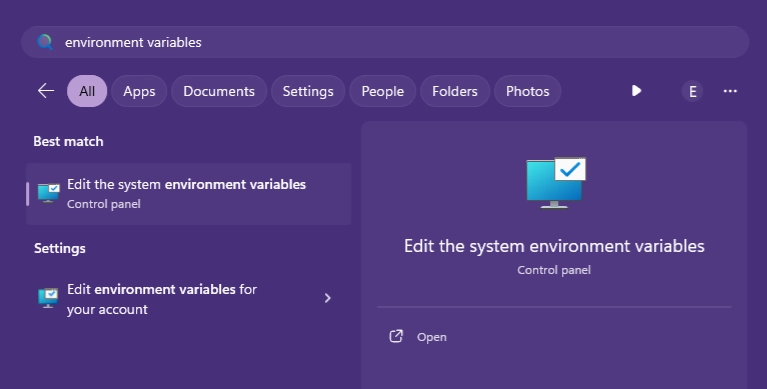
It is also possible to set the environment variable in Windows GUI via “Environment Variables” settings. Similar to the preceding approaches, this will also set the environment variable globally on the system.
You can access the “Environment Variables” settings via “Control Panel > System > Advanced system settings > Environment Variables”. You can also simply search for “environment variables” in Windows:
From there, click “new” to add a new env. variable and provide a name and a value:
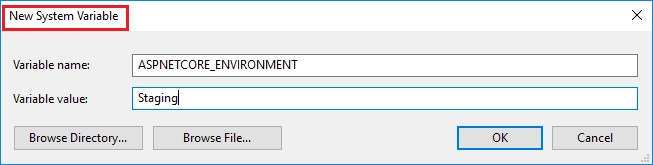
The env. variable name needs to be ASPNETCORE_ENVIRONMENT, and the variable name will specify the environment name (e.g., Staging, PreProd, etc.)
3.4. Using Web.Config File
If you would rather set the env. variable on a project basis rather than having a global env. variable for all projects on the system, you could use a web.config file on your project’s root directory, in the environment variables section. For example:
<aspNetCore processPath="dotnet"
      arguments=".\MyApp.dll"
      stdoutLogEnabled="false"
      stdoutLogFile=".\logs\stdout"
      hostingModel="inprocess">
  <environmentVariables>
    <environmentVariable name="ASPNETCORE_ENVIRONMENT" value="Staging" />
    <environmentVariable name="CONFIG_DIR" value="f:\application_config" />
  </environmentVariables>
</aspNetCore>
3.5. Setting Environment Variable with Code
Finally, it is also possible to set the env. variable in code. I would not recommend this approach, but it may be useful incertain scenarios. Here is how you could do this in an ASP.NET Core project:
var builder = WebApplication.CreateBuilder(new WebApplicationOptions
{
    EnvironmentName = Environments.Staging
});
4. Using Environment Variable
4.1. Environment-Based Project Configuration
Finally, we have come to the nuts and bolts. Let’s look into how environment-based configuration is managed in an ASP.NET Core project.
In an ASP.NET Core project, you can read the current environment, which will be especially useful if you need to dynamically register middleware or services. For example:
#if DEBUG
if (builder.Environment.IsDevelopment())
    mvcBuilder.AddRazorRuntimeCompilation();
#endif
This code checks both the “configuration” (which may be Debug or Release) and the current enviroment, and enables runtime compilation of Razor views if the current environment is “Development” and if the application is being built in debug mode.
Here are some useful methods you can use to read the current environment:
- IsDevelopment() : Returns
trueif the current environment isDevelopment - IsStaging() : Returns
trueif the current environment isProduction - IsProduction() : Returns
trueif the current environment isStaging - IsEnvironment(string environmentName) : Returns
trueif the current environment matches the specifiedenvironmentName
Here is an example piece of code you may find useful, which conditionally registers developer exception page during development and sets up custom exception handling in production:
if (app.Environment.IsDevelopment())
{
    Log.Information("Development environment detected. Setting up developer exception page.");
    app.UseDeveloperExceptionPage();
}
else
{
    Log.Information("Production environment detected. Setting up global exception handler.");
    app.UseStatusCodePagesWithRedirects("/Error/{0}");

    app.UseExceptionHandler(appBuilder =>
    {
        appBuilder.Run(async context =>
        {
            var exceptionHandlerFeature = context.Features.Get<IExceptionHandlerFeature>();
            if (exceptionHandlerFeature == null) return;

            var errorCode = Guid.NewGuid().ToString();
            var exception = exceptionHandlerFeature.Error;

            var userName = "Anonymous";
            if (context.User.Identity?.IsAuthenticated == true)
                userName = context.User.Identity.Name;

            Log.Error(exception, "GLOBAL EXCEPTION HANDLED. Error Code: {ErrorCode}, User: {UserName}, Time: {Time}", errorCode, userName, DateTime.Now);

            var redirectUrl = $"/error/500?errorCode={errorCode}";

            context.Response.Redirect(redirectUrl);
        });
    });
}
You can then handle this redirection and display an appropriate screen to inform users that an error has occurred, along with the error code, so they can provide it when contacting you.
4.2. Accessing Environment From Front-End (Razor)
Besides configuring the project, you may also need to access the current hosting environment information from the front-end so that you can dynamically display html content. For this, you can use the built-in “environment” tag helper that ASP.NET Core provides, which conditionally renders its content based on the current hosting environment. This tag helper accepts three parameters: names, include, and exclude. You will probably only use one of the three.
The names and include parameters behave exactly the same: they accept a list of environment names separated by commas, and they render the content if any of the listed environments match the current environment.
<environment include="Development,Staging">
    <p>
	    The current hosting environment is either Development or Staging.
    </p>
</environment>
The exclude parameter, on the other hand, will render its contents only if the current hosting environment does not match the provided value.
<environment exclude="Production">
	<p>
		The current hosting environment is anything but Production.
	</p>
</environment>
5. References
- ASP.NET Core Documentation
- Manning Books
- Andrew Lock